Get started with AdSense (2)
The AdSense registration in 5 steps
Here is an important preliminary remark: The registration and creation of an AdSense account is different from the creation of an account for any app, where you quickly enter a few data and if for some reason it does not fit or you do not like the app, then delete it again. Signing up for AdSense is the beginning of a possible long-term business relationship where the data must be correct and also verified.
This business relationship is about income, taxes and tax office, payments and bank accounts. Therefore, there are many legal and regulatory requirements that have to be fulfilled and you have to take this seriously and provide serious and correct information.
You can only have one AdSense account. If something is inconsistent, you may not have the opportunity to create an account again later.
 Important: Do not create an AdSense account just for fun or as a trial, but only when you meet the requirements and you seriously want to monetise your website or your Youtube channel with AdSense!
The AdSense Login
For Youtube, Blogger and other AdSense partners, registration takes place via these partners and not via the AdSense website! You can then read about the procedure in the corresponding help page.
If you want to monetise your website, you can start now with this link:
Start AdSense for content pages
You will also use this Google AdSense login later to access the dashboard.
The Google Account
Before you create an AdSense account, you will be asked to sign in with your Google account. If you do not yet have a Google account, you must first create a new Google account. The same applies here as already explained above: Since you are entering into a business relationship with Google via AdSense, all information must be entered carefully and correctly. Some of the information will also be transferred to your AdSense account.
In addition to personal data, this may also include address and payment data. Here is also a note for young people: AdSense is only possible from the age of 18 and it does not help to lie about your date of birth, as your identity will be checked later.
The address data is also checked later. You have to enter an address where you can be reached by post. The country must also be correct, as it cannot be changed later.
Also important: If you delete your Google account later, the AdSense account will not be deleted or closed. You will just no longer have access to your AdSense account and may no longer be able to monetise your website with AdSense.
The creation of the AdSense account
After logging in with the Google account, the registration process begins.
Step 1: Add the website
You can already enter your website here. I don't think the option 'I don't have a website yet' makes sense, because it can take a long time until a website is so successful that it meets the requirements. Then I would wait and register later.

The format you can enter is without https. Therefore, I would recommend the following format: your-domain.tld .
Another important point: You cannot enter a subdomain at this point. If you want to monetise a subdomain, the main domain must first be approved and fulfil all conditions and requirements for AdSense.
Step 2: AdSense notification option
You can activate the option to receive individual tips and suggestions for optimising performance by e-mail. My experience: It is very useful to read the tips and consider whether they fit your own website.
Step 3: Select country / region
As mentioned above, it is important to choose the right country, as you will not be able to change it later. The reason for this is, among other things, tax requirements. The country also has an important meaning for the bank details, as most of the time you will have to provide proper bank details from this country later on.
 The country cannot be changed later! If you move, you will have to close the account and apply for a new one in the new country.
If you can already foresee that you will soon be moving to another country, you should wait with the registration until you live there and also have the corresponding official ID. If you already have an AdSense account and are moving to another country, you must close your AdSense account beforehand and then re-apply at your new place of residence. If you have not done this, it may be difficult to close the old account because you do not have a domicile or bank account. Then you may not be able to get a new account, as you are only allowed to have one.

So you choose the country and then the terms of use open up for you to confirm. Since this is a long-term business relationship: My urgent recommendation is to actually read through them. Many problems or disagreements can be avoided and you will know exactly what you are agreeing to.
Step 4: Set account type and address
After registration, your AdSense account will be created and you will have access to the dashboard. Now there are two mandatory steps. First, you need to set the account type and address.
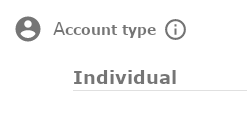
Account typ
For the account type you have the choice between 'Individual' and 'Business'. Since this option can no longer be changed later and there are often errors here, caution is advisable! The wrong choice may prevent the identity confirmation later on.

The account type business is only intended for companies, organisations or educational institutions. When confirming your identity, you must then present an excerpt from a commercial register, for example.
However, most publishers or Youtubers are not registered in a commercial register and individual is then the right choice. As a rule, they also have to pay tax on their income and register a business if necessary, but you still have to select "individual" for the account type.
If you are unsure what to choose, you can orientate yourself by the name on the bank account to which the income is to be transferred. If it is a company name, e.g. LLC, it is a business account, if it is your name, it is a individual account.
 Attention: The account type can no longer be changed later!
Name and adress
Next, enter the name and address. Since an AdSense account cannot be transferred, it is also important here that the name is entered correctly. And the address must be available by post and must correspond with the ID card used for the later identity check.

Step 5: Connect website with AdSense
I will skip the step 'Check how the ads look on your website' here. This will be covered in more detail another time when setting up the ads.
The next step starts with 'Get started now'. You will be redirected to the next page where you will receive an AdSense script with which you can connect your website to AdSense. You can then integrate this script in the <head> area of your website.

My recommendation: Do not start the verification process until you have integrated the script and updated the website. You may need patience for the verification process. It may take a few days or up to 4 weeks. The duration depends on two factors:
- A website with a lot of traffic is usually checked more quickly because the checking process is largely automated.
- Sometimes there is also a manual check of the website, which takes more time.
Either way, patience is the only thing that will help you, as you cannot speed up the process and there is no support for it.
The inspection process can also be applied for without including the script. To do this, it is necessary to upload a file called ads.txt to the root directory. Here you can find information on how to create the ads.txt:Ads.txt guide
A third method is to include a meta tag in the head section.
The site will then be validated immediately and you will be notified of the result.
Still important: After the approval you should not forget to integrate the script for the ads on your website, otherwise no ads will be displayed!
Error messages after the inspection
Ideally, after some time you will receive an email that you can now get started and integrate ads, either automatic or manually placed, on your site. Then I congratulate you and wish you success in monetising the website! But sometimes there are problems and the site is not approved (immediately).
Status: Getting-ready
'Getting-ready' is not actually an error message, but shows the status of the check. As already mentioned above, patience is required here. This status message may well remain for two to four weeks.
Ads.txt not found
Even if the ads.txt is implemented correctly, the status remains 'not found' for the time being and is only updated after approval. If the error message is still displayed after approval, it may also have another cause. Possible causes are described in my postAdSense issues.
Website down or unavailable
After registration, the website is visited by the Google crawler to check the site. If the website is actually offline or the crawler is locked out, you will get the following error message: 'Website down or unavailable'.
In my blog post 'AdSense issues' I described the problem and possible solutions in more detail:
To the postNo access for the crawler
Policy violations
Another problem can be policy violations. The AdSense programme guidelines are very comprehensive and varied. It definitely makes sense to deal with them intensively:
AdSense policies
Not only do they play an important role in the approval process, but policy violations can also lead to ad or account suspensions later on. Unfortunately, the feedback "policy violations" in the review process is sometimes quite vague and you may not know what you need to improve. Then it is usually because you do not fulfil the basic requirements, a lot of textual content and a lot of traffic from search engines. I explained this in detail in Part 1 of the series::
To the post: AdSense for beginners: The requirements
The next part (3) of the series 'get started with adsense' is about setting up the first ads.:
The AdSense ads
About the author


Michael Dilger-Hassel aka Milanex
Since 2011 I have been involved with all aspects of successful websites as a publisher and since 2015 I have been active in several support forums on the topic of AdSense and webmasters under the nickname 'Milanex'.
As a Google product expert 'Diamond', I have been supporting other publishers on a voluntary basis for years on all questions concerning Google AdSense.
In this blog, I take up questions from the forums and use my experience for tips and tricks. I present individual topics in detail and in depth to enable optimal use of AdSense.
To the vita
If you have any suggestions, comments or proposals for the blog post, please contact me bye-mail.I am happy to receive feedback!


 If your website meets the
